
Create/Select Application Questions
You have the option of importing and/or creating your own questions and/or using a set of pre-populated, frequently used questions in your applicant tracking setup. If you have a list of questions for your applications that you would like imported prior to your software deployment, please send your list to your Deployment Facilitator. Questions that are to be imported should be completed prior to beginning the selection of questions to be used.

Click on Hiring from your HR Dashboard

Click on ?Question Bank under the Applicant Tracking menu

Select the questions from the Question Bank that you would like to use by clicking on the question

- You can select questions during the setup process that you don’t want to use for every application but do want to use for some. To make the question Active/Inactive, select Yes or No under Active as shown above
- The sequence is the order that the question will appear in the application. When setting up your sequence numbers, use sequences of 50, (1, 50, 100,150,200, etc…) This will allow you room to add questions and change the order of your questions if you need to in the future
When the question opens, you can modify how the question is used (Question Type, Active Y/N, Sequence Number, Is Required Y/N and is this a knock-out question) and modify the question title and Question text

- Knock-out questions will set the application to be declined if the applicant did not meet the requirements for the position, this saves you time during your review.
- If you make changes to the format of your question after selecting the correct answer for your question, you need to select the correct answer again before you save it. If you don’t complete this step, the wrong answer may be marked as the correct answer and cause applicants that meet criteria to be listed as declined.
Creating Multiple Application Versions
You will have the option of creating a new application and/or cloning, (copying) an application that you already have. Cloning is a good tool when you have similar positions and/or want to ask the same questions.
Click on the Hiring tile

Click on Application Version found under Applicant Tracking.

Here you have the option to create or clone applications. If you choose to create a new application, click on New and complete the fields. Remember to click “Save” so your changes aren’t lost. If you choose to clone an application, you can edit the cloned application to add/remove any information you would like.

To clone an application, click on  next to the application you want to clone, under the Actions box
  .
.
You will see a pop-up box  click Yes to clone the application.
Now you will see the Cloned application and you can edit it to make changes

Click on the cloned application to open and edit it

You will see

Change the Title, Description and Version date if needed

Save your changes if you need to stop before you finish your editing, so you don’t lose your work. You will not be prompted to save changes by the program.

Each time you Save Changes, you will be taken back to the Application Version window. Click on the application that you are working with to open it again.
Change Keywords, if needed

If you see this icon:  you can click on it to see detailed information about the field next to it. Click the icon again to close the window
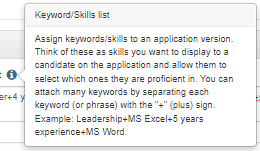
If you want to add any questions, click on the arrow/drop box under Choose Question and LINK to this application, select the question you want to add

After you have selected the question you want to add, click on “Link Question”

You will see a pop-up box letting you know that your question has been linked

If you want to remove any of the questions that you selected previously, click on the trash can next to the question

To add Custom Forms, move to Custom Forms Selection and click on the Please Choose dropdown box to select the forms you want to add

Notice that the Saved Custom Forms Selection is blank. When you have selected at least 1 form and saved your changes, the form will appear in this box.

Each time you Save Changes, you will be taken back to the Application Version window. Click on the application that you are working with to open it again. The form is listed under your Saved Custom Form Selection


To add the Voluntary EEO Disclaimer, move to the Section Additional Descriptions box and click on Generate Sample Disclaimer

You also have the option of typing or pasting in your own disclaimer
If you choose to add your own disclaimer, you will need to use a .txt document. If you copy/past from Word it will not not format correctly in the system and will not look right.

Once you click “Save Changes” your application version is ready to use when you have an opening for this position.

Applicant Tracking Status Setup
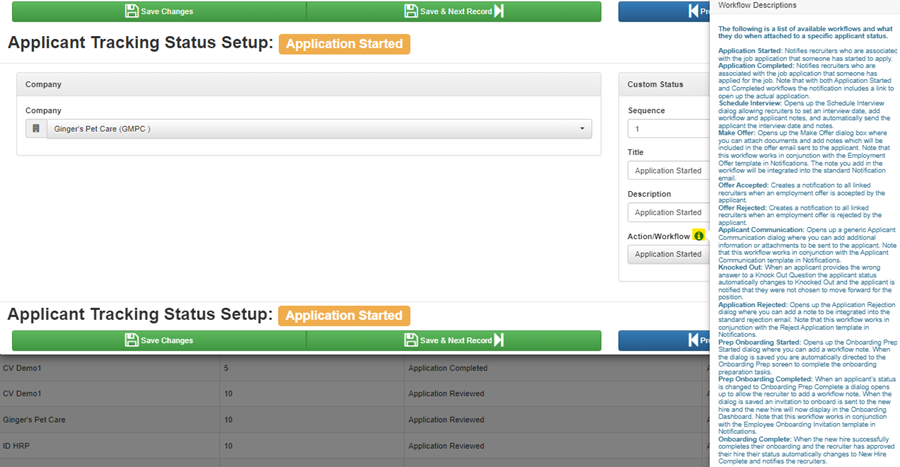
To open a workflow from the Applicant Tracking Status Setup window, click on the title

You will see a pop-up box

Click on the  next to Action Workflow and it will open Workflow Descriptions that tell you what they do when they are attached to a specific applicant status. To close the Workflow Descriptions, click on the again.
Posting an Open Position Instructions
Click on Hiring on your HR Dashboard

Click on Job Posting

Click New

- Fields highlighted in yellow are required
- Fields highlighted in blue are optional
- Remember to come back after you have completed the Job Posting to link recruiters to the Job Posting so they will have access to it.
As a recruiter, you will only be able to see jobs that you are linked to. If an HR Recruiter needs to be assigned and a manager needs to be assigned to a job posting, make sure to link both the Recruiter and the Manager, even if the Recruiter is posting the job. If the Recruiter does not link themselves to the Job Posting, the Recruiter will not be able to see it anymore after the Manager is linked to the Job Posting. As an HR Admin, you will be able to see all job postings and can link the Recruiter/Manager to the job posting if needed.
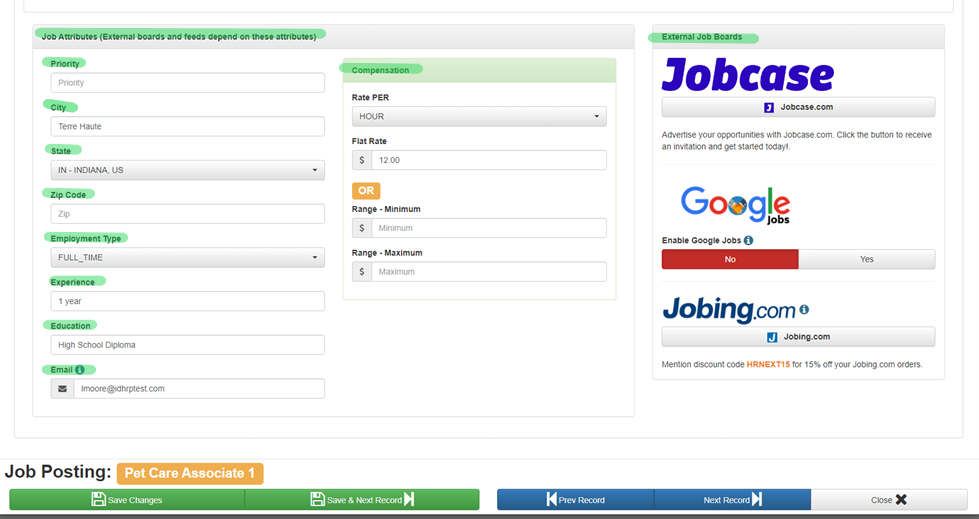
- Fields highlighted in yellow are required
- Fields highlighted in green are only required if you want to post your job to an external job board.
When you have completed your information, click on “Save Changes.”

Recommended Job Board Integrations with Jobcase or Jobing.com:
Integrity Data’s HR software has a built-in integration to multiple job boards through Jobcase and Jobing.com. This is the most efficient way to interface with external Job boards. Jobcase/Jobing.com will receive the job posting file straight from HR and allows applicants to apply directly within HR. Jobcase/Jobing.com also allows you to post the job opening to other boards you want to use, the markets you want to target, and allocation of money to spend through the process. You can manage all the job board interactions with one Jobcase or Jobing.com account.
We also integrate with Google Jobs. This process is different. When this is enabled, Google Jobs will search your Integrity Data HRP system and find your published job openings to share on their site. This is updated routinely according to their schedule.
If you choose to use non-integrated job boards:
You will need to set up accounts with the external job boards that you want to use.
A file will be automatically created that is built to communicate your job posting information with whichever job board(s) you choose. Within that file is a link directly into your HR software. Now, when an applicant is on the job board and applies for your position, they will be linked into your HR software to complete the application. As a result, you will not need to import applicants, they will automatically show up in your HR application. Sometimes external job boards do not like to link back to HR because they want to capture the applicant data themselves, but they will allow it when pressed. You can upload the job posting file to multiple job boards if you choose.
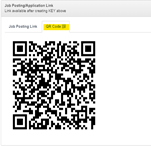
This is an example of the QR Code that will be included along with the job posting file. It can be scanned with a cell phone and will open the application on the phone where it can be completed and submitted for your review.
You will see your new job posting listed

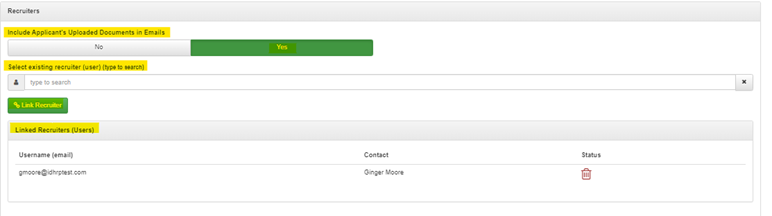
- Open your job again by clicking on it
- Link a Recruiter to it
- Set the job to include Applicant’s uploaded Documents in Emails
- Click “Save Changes” and you have completed your job posting.
Applicant Tracking Dashboard
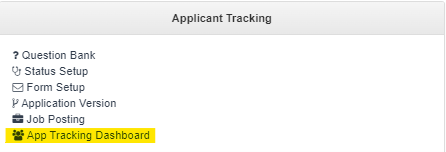
Click on Hiring from your HR Dashboard
Click on App Tracking Dashboard
To review an application, click on the applicant’s name and it will open their application
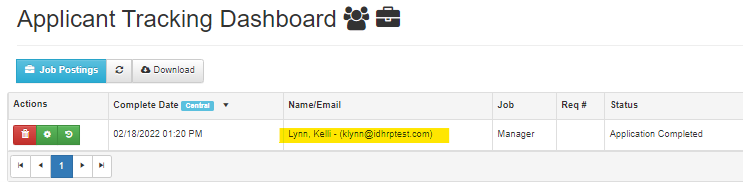
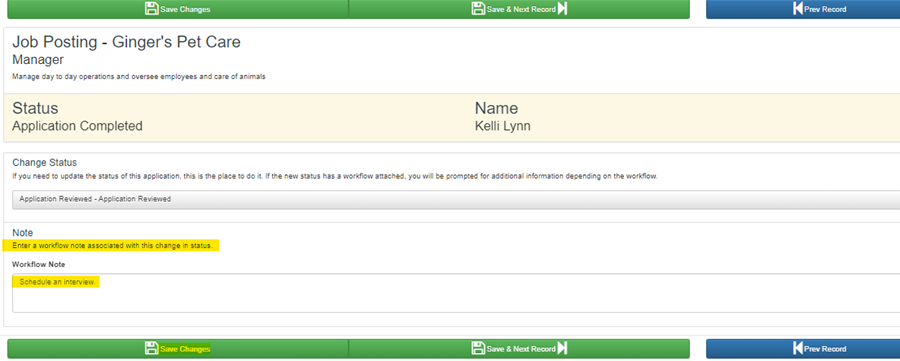
When you have reviewed an application and want to interview the applicant, click on the wheel under Actions next to the applicant’s name

Select the next step in the process – Application Reviewed
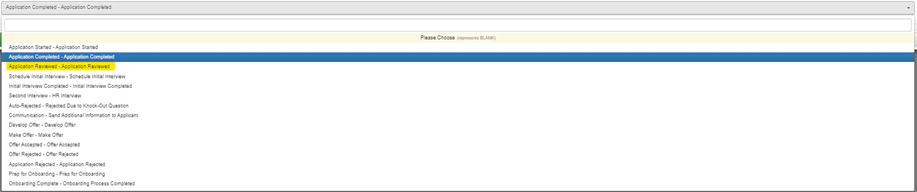
The Status will update to Application Reviewed
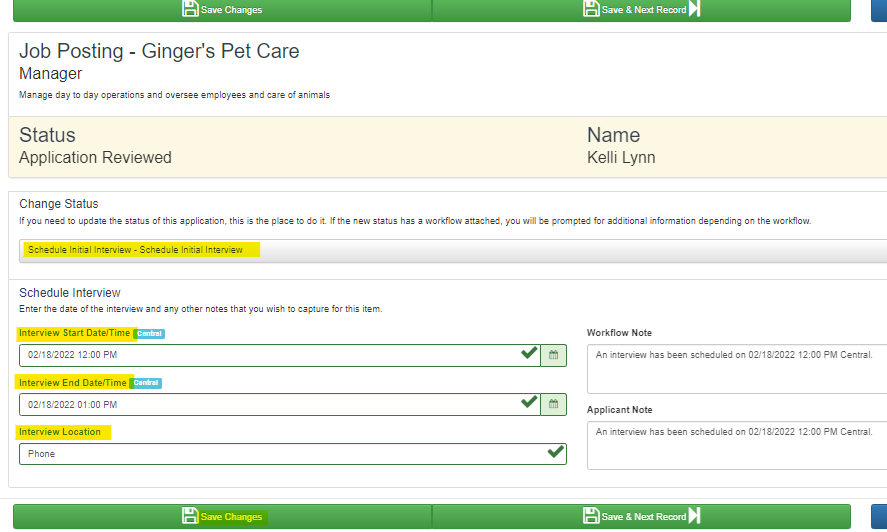
Once you are ready to interview an applicant change the status to Schedule Initial Interview and fill in the Schedule Interview fields
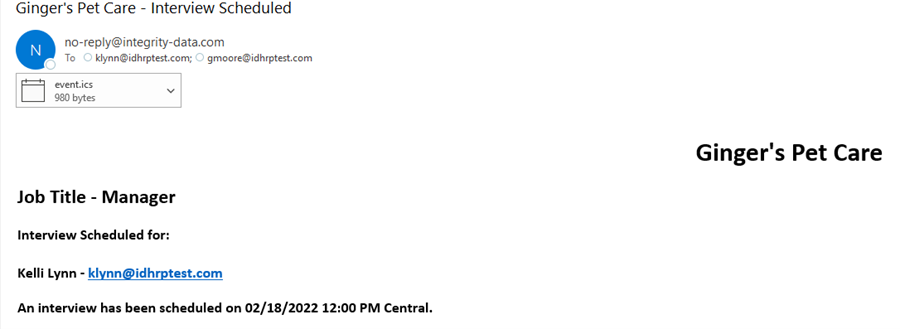
After you click “Save Changes,” an email will be sent to the applicant and the recruiter
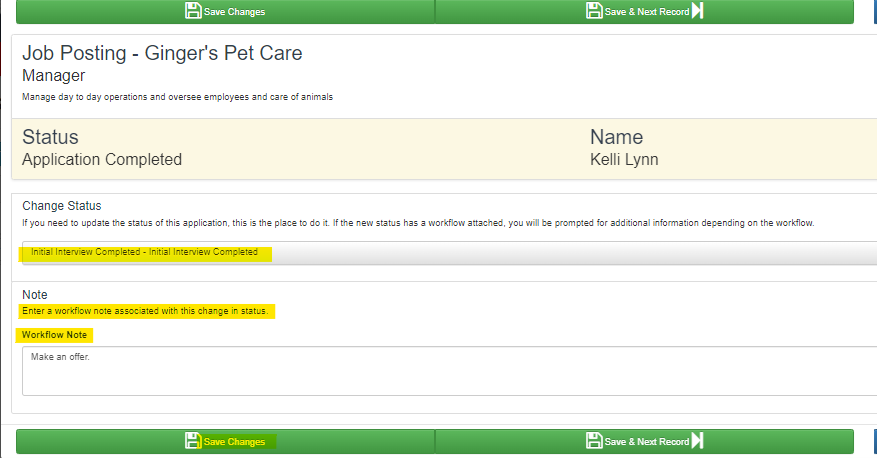
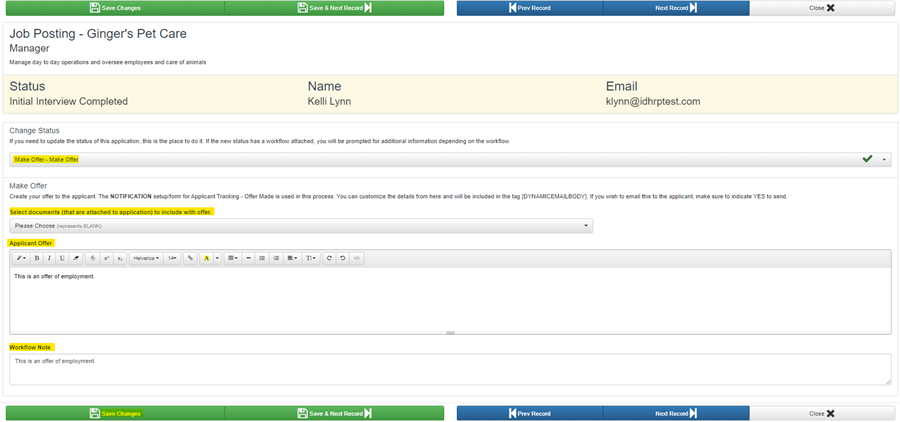
After the interview, if you want to make an offer, click on the wheel again and change the status to Make an offer.
If you want to extend an offer, click on the wheel again and change the status to Make Offer. You have the option of attaching a document, (example: PDF offer letter). Click “Save Changes” when you are done.
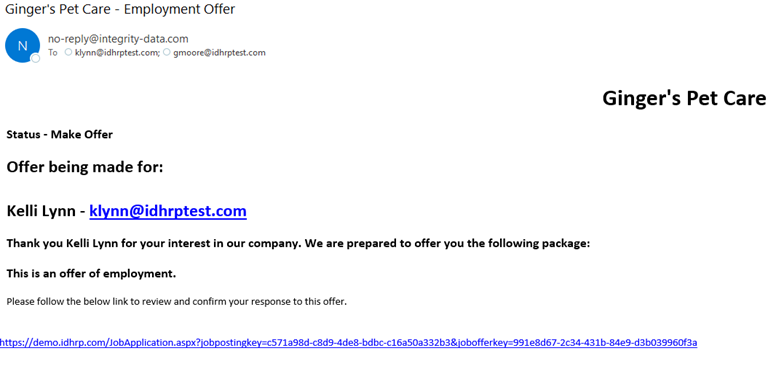
The applicant and recruiter will receive an email
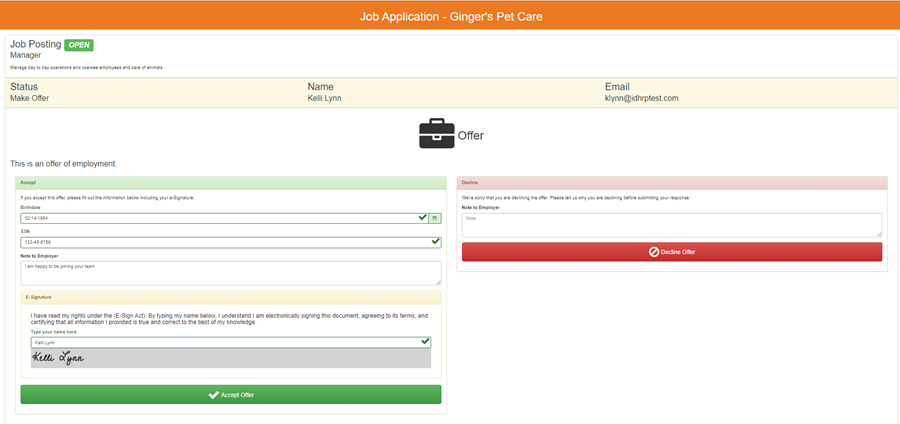
When the applicant clicks on the link, they will be taken to the application to accept or decline the offer
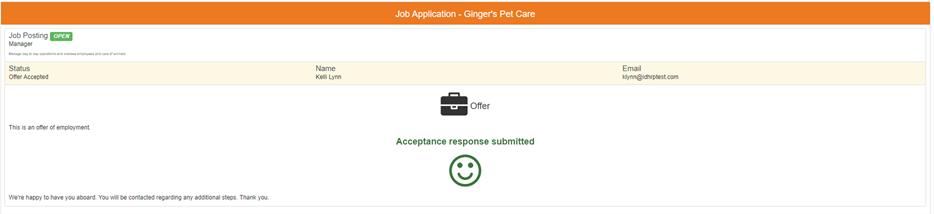
When the applicant electronically signs the offer and clicks except offer, they will see the following message
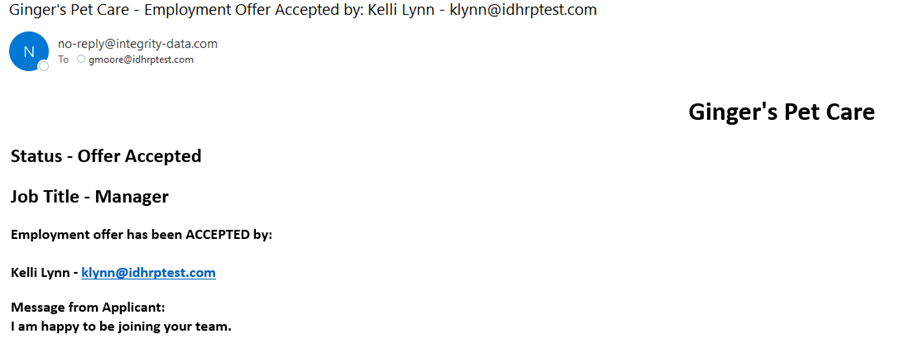
An email will be sent to the recruiter
Questions / Resources
If you have questions or comments please email support@integrity-data.com.
Last Review: 05/02/2023
Leave A Comment